DITA Editor
Oxygen offers advanced DITA editing support, covering DITA 1.1, 1.2, and 1.3 standards,
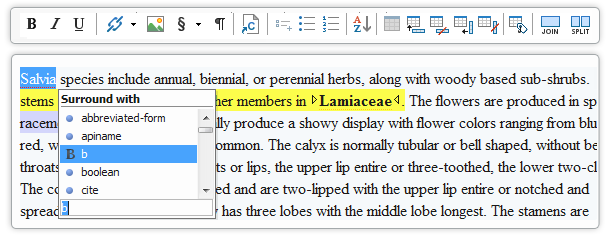
and allows users with limited knowledge of XML to edit DITA documents in a visual interface
(similar to a WYSIWYG word processor). The DITA Open Toolkit publishing engine comes bundled
with the application.
- DITA EditingOxygen includes out-of-the box support for DITA (including DITA specializations), such as specific actions, full table support, content completion assistance, and dynamic conversion from Office applications to DITA when copying and pasting content.read more
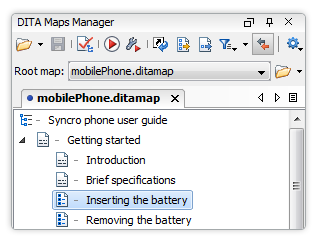
- DITA Maps ManagerDITA maps are key components for authoring DITA content. Managing these files and their referenced topics is an important feature for a DITA editor.read more
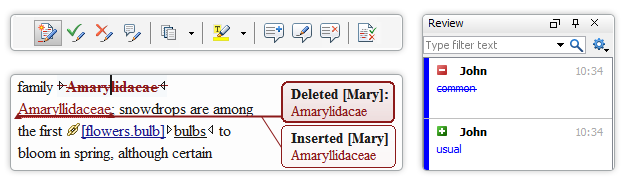
- Content Review and Change TrackingCollaboration is a key to success for up-to-date and top quality documentation. Using Oxygen, authors and reviewers can work together seamlessly, adding comments, seeing each others changes, and searching reviews.read more
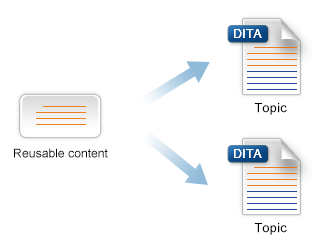
- Content Re-UseContent re-use is an important feature of DITA documentation. Oxygen offers support for content re-use by allowing you to create content references and conditional text.read more
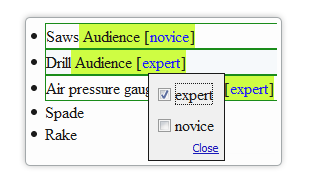 Profiling/Conditional TextOxygen offers full support for DITA conditional text processing. Profiling attributes can be managed easily to filter content in the published output. You can toggle between different profile sets in the Author mode to see what will be included in the output.read more
- Single-Source DITA PublishingOxygen includes the industry standard DITA Open Toolkit for converting from DITA maps to final output (PDF, CHM, EPUB, etc.) Oxygen also offers out-of-the-box support for generating high quality feedback-enabled or mobile-friendly WebHelp.read more

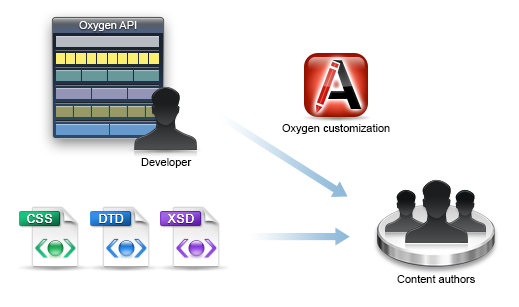
- Editor ExtensibilityYou can extend the DITA functionality of Oxygen by changing the CSS files used for rendering documents, by defining a broader set of operations and actions, by using available add-ons, or by creating your own plugins.read more