Projects and Publishing
An introduction to projects in Oxygen Content Fusion and how they support content management, review workflows, and publishing deliverables.
Oxygen Content Fusion offers the ability to manage DITA Projects. Users with the Author platform user role can create such projects, import content, and manage its lifecycle from creation, to review, to publishing as PDF or Oxygen WebHelp Responsive.
What is a Project in Content Fusion?
- Provides Git-based storage for DITA content.
- Allows authors to create content with AI assistance.
- Provides a graphical interface to manage review tasks within the project.
- Helps Authors build WebHelp or PDF outputs via Publications and Deliverables.
Main Projects Page
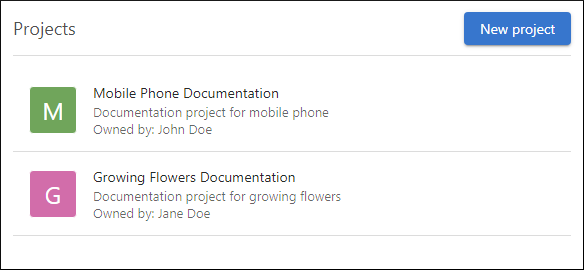
Projects is one of the two main components (along with Review Tasks) within the Content Fusion browser interface. The main Projects page shows all the projects you have access to.
To open an existing project, simply click on it. This opens the project's Publications page by default.
Creating a New Project
Click the New project button to create a new project. This opens a dialog box where you can choose between two options for creating a project:
- Import from Git - Configure the connection to your Git repository. It includes
the following fields:
- Name - The name of the project.
- Description - The description of the project. It is displayed under the project's name in the main Projects page.
- Project URL - The URL of the Git repository.
- Branch - The default branch of the project.
- Visibility - You can choose between Public (accessible by all members) or Private (restricts access to select members).
- Username and Access Token - You can enter the Git credentials
(username and access token) using this option. Notice:For details about how access tokens should be created and configured, see Creating Git Access Tokens for Projects.
- Git Account - Use this option to select a preconfigured Git account.
- Once you are done configuring the details, click the Create project button to finish the creation process.
- Create from a template - Choose the following configuration options:
- Choose template - You can choose from predefined templates to create a
project. The available templates include:
- An empty project.
- A Software Docs Starter starter DITA XML project.
- Various sample DITA projects, including:
- Circle Chat - A sample software documentation project showcasing reuse and profiling.
- Syncro Smartphone - A sample hardware documentation project showcasing the use of keyscopes and branch filtering.
- Hydraulic Gear Pump - A sample hardware documentation project showcasing the use of an image map.
- Sunny Sky - A sample API documentation project showcasing the inclusion of an OpenAPI JSON file in a DITA XML project.
Note:A project created from a template is stored internally in Content Fusion. Later, you can link an external Git repository and all the content will be moved to that repository. - Name - The name of the project.
- Description - The description of the project. It is displayed under the project's name in the main Projects page.
- Visibility - You can choose between Public (accessible by all members) or Private (restricts access to select members).
- Choose template - You can choose from predefined templates to create a
project. The available templates include:
The newly created project is automatically opened with the project's Publications page displayed.
A URL query parameter (in the form of /projects/new-from-url?url=) can be used to create a project from a Git repository. This is useful for advanced scenarios where you want to provide a project creation URL in documentation, tutorials, or as a button in a CMS.
The URL parameter accepts either a Git repository URL or a download archive URL generated by a Git server. For the archive URL option, the generated archive should have a root folder where the content is located. An optional folder parameter can be used to specify the folder where the content is located that will be used to create the project.
Git repository URL example: https://example.com/projects/new-from-url?url=https://github.com/user/repo&folder=template_1
Archive URL example: https://example.com/projects/new-from-url?url=https://github.com/user/repo/archive/refs/heads/main.zip&folder=template_1
Branch Management
When a project is open, the top stripe contains a branch management drop-down menu. The current branch is displayed inside the box and you can click it to select a different branch (all the Git branches from your project are available).

- Create new branch - Opens a dialog box where you can choose the name for a new branch and an existing branch to base it on.
- Delete branch - Opens a confirmation dialog box where you have the option to delete the current branch.
- Merge into current branch - Opens a dialog
box where you can select an existing branch to merge into the current branch.
Figure 3. Merge Branch Dialog Box 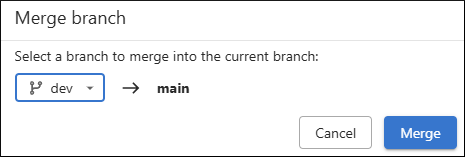
In the Merge Branch dialog box, you can select which branch to merge into the current one. Click Merge to initiate the process. If the merge succeeds without conflicts, a Merge successful message is displayed.
If there are files with conflicting changes, a special branch merging conflict resolution dialog box is initiated where you can choose a merge action for each particular conflict and you can view each version of a conflicted file in a side-by-side comparison view.