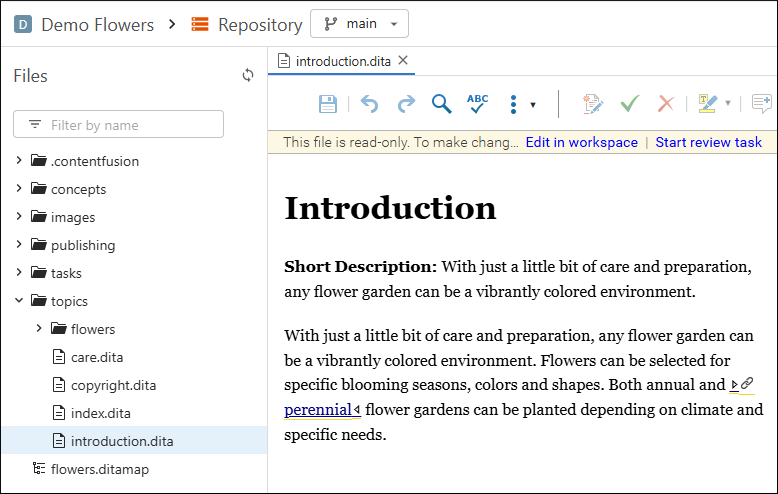
Project Repository Page
The Repository page displays all of the submitted/committed content for the current project and provides ways to open/edit the files in the visual editor, add files to a new review task, and branch management actions are available from the branch drop-down menu in the header stripe.

You can expand or collapse folders similar to any common file browser. Double-click on a file to open it (as read-only) in the visual editor. If you hover over a folder or file, a 3 vertical dots menu appears. It contains contextual actions for that particular folder or file.
To add a file to a new review task that will be created, click the 3 vertical dots next to the file and select Add to review task. This initiates a new task creation process. You need to specify a Title and select a Context Publication, which is the DITA map that will be used to resolve keys in the topics that will be sent for review (see Project Publications for more details).
You can use the  button at
the top-right of the Files pane to synchronize the information in the
view with the Content Fusion server.
You can use the Filter by name text field to search for a file by name.
Proposing Changes to Project Files
Project files cannot be edited directly. Instead, changes must be proposed through one of two dedicated workflows. These workflows ensure that edits are made in a controlled, traceable way, supporting collaboration, review, and versioning.
Whenever you open a file from a project, a message appears at the top of the editor to let you know the file is read-only and offers the following options for proposing changes:
-
Edit in Workspace - This opens the file in your personal workspace (a private drafting area where you can make changes freely). Once you are satisfied with your updates, you can commit them to the project along with a commit message.
-
Start Review Task - This starts a review process involving the current file. You can suggest changes that can then be discussed and reviewed by collaborators. Once approved, the updates can be integrated into the project.
Branch Management
When a project is open, the second stripe contains a label to make it clear that you are editing inside the Personal Workspace and it includes a branch management drop-down menu. The current branch is displayed inside the box and you can click it to select a different branch (all the Git branches from your project are available).

- Create new branch - Opens a dialog box where you can choose the name for a new branch and an existing branch to base it on.
- Delete branch - Opens a confirmation dialog box where you have the option to delete the current branch.
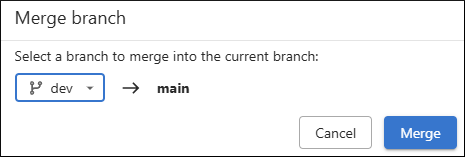
- Merge into current branch - Opens a dialog
box where you can select an existing branch to merge into the current branch.
Figure 3. Merge Branch Dialog Box 
In the Merge Branch dialog box, you can select which branch to merge into the current one. Click Merge to initiate the process. If the merge succeeds without conflicts, a Merge successful message is displayed.
If there are files with conflicting changes, a special branch merging conflict resolution dialog box is initiated where you can choose a merge action for each particular conflict and you can view each version of a conflicted file in a side-by-side comparison view.
