Task Files Page
Clicking on Files in the left stripe opens the Task Files page that lists all the files that are attached to the task.
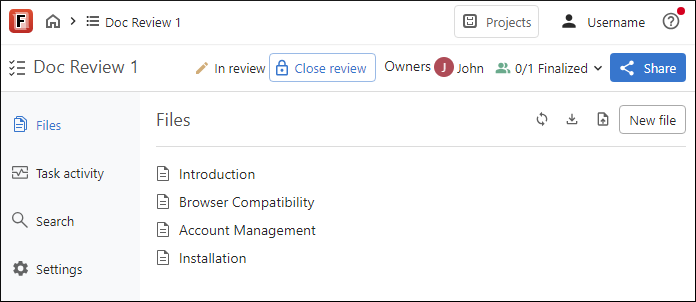
You can click on a file to open it in the visual editor. If other people have the file open, you will see their avatars next to the file. You can hover over an avatar to see the name of the person.
If the Concurrent Editing feature is
enabled for a particular task, multiple people can work on the same file simultaneously.
Otherwise, only one person can edit the file at once. If someone else is currently editing the
particular file, you will see a  Lock icon on the left side of the
Files box and that person's avatar will have a red border. When a
file is locked, no one else can edit the file until that person navigates out of the visual
editor, closes the browser, or uses the Finalize My Review button. If
you hover over the lock icon, it will show you who has the file locked.
Lock icon on the left side of the
Files box and that person's avatar will have a red border. When a
file is locked, no one else can edit the file until that person navigates out of the visual
editor, closes the browser, or uses the Finalize My Review button. If
you hover over the lock icon, it will show you who has the file locked.
To refresh the list of files, click the  Refresh button on the right side of the Files
header.
Refresh button on the right side of the Files
header.
To download the task, click the  Download button. This downloads a zip archive that
contains all task files, along with change history downloaded as a Git working directory
(making changes traceable). To inspect the history, extract the archive and open the root
directory in your Git client. Information about the email and author name of the person who
made the change in Content Fusion is included.
Download button. This downloads a zip archive that
contains all task files, along with change history downloaded as a Git working directory
(making changes traceable). To inspect the history, extract the archive and open the root
directory in your Git client. Information about the email and author name of the person who
made the change in Content Fusion is included.
To upload a file to the task, click the  Upload button. This opens the system file
browser where you can select the file to upload.
Upload button. This opens the system file
browser where you can select the file to upload.
The review task header stripe (just below the upper stripe) contains useful information and actions for the particular review task. The components in this header stripe remain persistent regardless of the page you navigate to within the review task.
Creating a New File Inside a Task
- Click the New File button to create a new
file from a list of templates. Select an appropriate template, choose a file name in the
text field at the bottom, and click OK.
Step Result: The new file is opened in the visual editor page with some of the XML structure already added for you.
- Use the visual editor to make changes to the document.Tip:Since you are the task owner, you have access to the
 Toggle
Change Tracking toolbar button. You may want to toggle this feature off
when adding content to a new file.
Toggle
Change Tracking toolbar button. You may want to toggle this feature off
when adding content to a new file. - The next logical step would most likely be to share the task with anyone you want to review the documents.