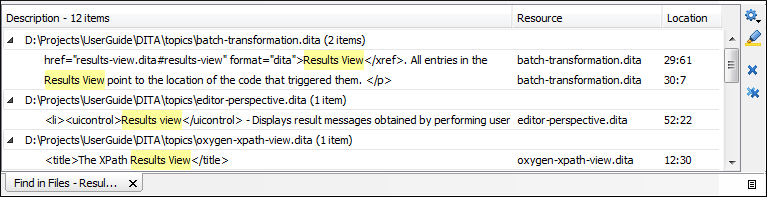
Results View
Results View Toolbar Actions
The view includes a toolbar with the following actions:
 Settings drop-down menu
-
This drop-down menu also includes the following options:
- Group by "Severity"
- Groups the results based upon the severity of the validation issues.
- Group by "Resource"
- Groups the results based upon the type of resource.
- Group by "System ID"
- Groups the results based upon the system ID of the resource.
- Group by "Operation description"
- Groups the results based upon the description of the validation issue.
 Ungroup
all
Ungroup
all- Removes the grouping rules so that the messages are presented in a continuous list.
- Show group columns
- If any of the Group by options are selected, you can use this option to show or hide grouping columns.
- Restore default grouping
- Restores the column size for each column and the grouping rules that were saved in the
user preferences the last time when this view was used. If it is the first time this
view is used, the action sets an initial default column size for each column and a
grouping rule that is appropriate for the type of messages. For example:
- Group the messages by the path of the validated file if there are error messages from a validation action or spelling errors reported by the Check Spelling in Files action.
- No grouping rule for the results of applying an XPath expression.
- Include problem ID in description
- If this option is selected, validation issues will include the problem ID (as provided by the validation engine) in the Description column.
- Show Ignored Problems
- If you have ignored validation problems, you can deselect this option to hide the ignored problems. Likewise, you can select this option to show the ignored problems.
 Highlight
all results in editor
Highlight
all results in editor- Oxygen XML Author highlights all matches obtained after executing an XPath
expression, or performing one of the following operations: Find
All, Find in Files, Search
References, and Search Declarations. Click
Highlight all results in editor again to turn off highlighting. Note:To customize highlighting behavior, open the Preferences dialog box and go to . You can do the following customizations:
- Set a specific color of the highlights depending on the type of action you make.
- Set a maximum number of highlights that the application displays at any given time.
 Remove
selected
Remove
selected- Removes the current selection from the view. This can be helpful if you want to reduce the number of messages, or remove those that have already been addressed or not relevant to your task.
 Remove
all
Remove
all- Removes all messages from the view.
Results View Contextual Menu Actions
The following actions are available when the contextual menu is invoked in this view:
- Learn Word(s) (Available when spelling errors are reported in the Results view)
- Adds the word(s) to a list of learned words to instruct the spell checker engine to not report the word(s) as spelling errors in the future.
- Show message
- Displays a dialog box with the full error message, which is useful for a long message that does not have enough room to be displayed completely in the view.
 Previous
message
Previous
message- Navigates to the message above the current selection.
 Next
message
Next
message- Navigates to the message below the current selection.
- Apply all default quick fix proposals
-
This action is available for the tabs in the Results view that displays the problems reported after a single file or batch validation operation. In the first phase, the quick fix proposals associated with the presented validation errors are automatically identified and mapped to the corresponding document (if multiple quick fix proposals are available for the same validation error, only the first one is considered). Depending on the number of quick fixes to be applied, the next phase analyzes the impact of their application and may take some time (an operation progress tracker shows the status).
Once complete, a preview dialog box is presented that provides an overview of the content changes that will be made for each document. The comparison panel also informs you of any problems encountered. In addition, you can choose to exclude certain files from the set of files that the quick fixes will be applied to if you do not agree with the proposed changes to be made. If you do agree with the changes presented, click Apply to trigger the procedure of applying the quick fixes and updating the contents of the documents.Important:Oxygen XML Author does not provide an automatic means for reverting changes made by this action so make sure you agree with the previewed changed for applying them. - Remove
selected
- Removes selected messages from the view.
- Remove
all
- Removes all messages from the view.
 Copy
Copy- Copies information associated with the selected messages. For example:
- The file path of the document that triggered the output message.
- The path of the main file (in the case of a validation scenario, it is the path of the file where the validation starts and can be different from the validated file).
- Error severity (error, warning, info message, etc.)
- Name of validating processor.
- Name of validation scenario.
- The line and column in the file that triggered the message.
- Copy Description
- Copies the description values for all selected items. It is possible to assign a shortcut key for this action.
- Select All
- Extends the selection to all the messages from the view.
- Print Results
- Sends the complete list of messages to a printer. For each message, the included details are the same as the ones for the Copy action. This action is also available in the menu.
- Save Results
- Saves the complete list of messages in a file in text format. For each message, the included details are the same as the ones for the Copy action. This action is also available in the menu.
- Save Results as XML
- Saves the complete list of messages in a file in XML format. For each message, the included details are the same as the ones for the Copy action.
- Save Results as HTML
- Saves the complete list of messages in a file in HTML format. For each message, the included details are the same as the ones for the Copy action.
- Group by
- A set of Group by toggle actions that allow you to group the messages according to a selected criteria so that they can be presented in a hierarchical layout. The criteria used for grouping can be the severity of the errors (error, warning, info message, etc.), the resource name, the description of the message, and so on.
- Ungroup
all
- Removes the grouping rules so that the messages are presented in a continuous list.
- Show group columns
- If any of the Group by options are selected, you can use this option to show or hide grouping columns.
- Restore default grouping
- Restores the column size for each column and the grouping rules that were saved in the
user preferences the last time when this view was used. If it is the first time this
view is used, the action sets an initial default column size for each column and a
grouping rule that is appropriate for the type of messages. For example:
- Group the messages by the path of the validated file if there are error messages from a validation action or spelling errors reported by the Check Spelling in Files action.
- No grouping rule for the results of applying an XPath expression.
 Expand All
- Expands all the nodes of the tree, which is useful when the messages are presented in a hierarchical mode.
 Collapse All
- Collapses all the nodes of the tree, which is useful when the messages are presented in a hierarchical mode.