How to Enable WebSocket Support When Using IIS as a Reverse Proxy
To enable WebSocket support in IIS version 8 or later, complete the configuration steps in one of the following methods:
Method 1
- In the Server Manager, go to the Add Role and Features wizard and select Server Roles.
- In the Roles pane, under , select WebSocket Protocal.
Method 2
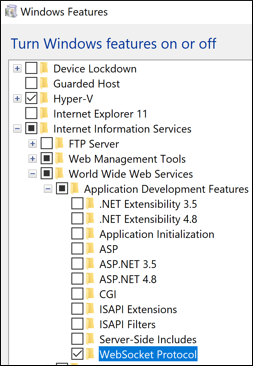
- Go to and open Windows Features.
- Activate WebSocket Protocol in the path
shown in the following image:
- Enable the WebSocket feature inside the IIS
server:
- In the Connections pane, select the server name to configure WebSocket for the server, or expand Sites and then select a site to configure WebSocket for the site, or expand a site and then select an application to configure WebSocket for the application.
- In the Home pane, double-click the Configuration Editor feature.
- For either a site or an application, select either web.config or applicationHost.config in the From text box.
- Select system.webServer/webSocket in the Section text box.
- Set enabled to
True to enable WebSocket
(False disables it).

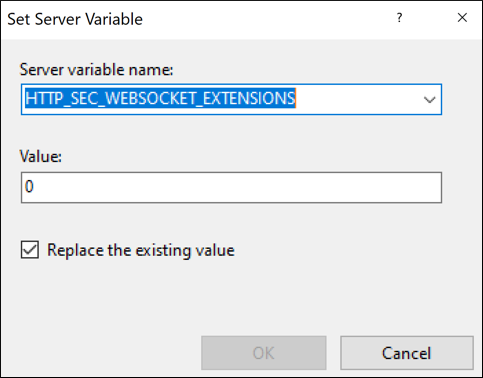
- The HTTP_SEC_WEBSOCKET_EXTENSIONS
server variable must be allowed in the server variable list. By default, the
distributed rewrite rules (e.g. the rules that are defined for specific sites or web
applications) cannot set or change any IIS server variable unless the server
variable is added to the Allowed list. For this procedure,
you need to add the following server variable to the Allowed Server
Variables list:
HTTP_SEC_WEBSOCKET_EXTENSIONS. - A server variable must be added in Web Author's proxy
Inbound rule (see the following image):