Oxygen XML includes some useful features to help you navigate XML documents in
Text mode.
Navigation Keyboard Shortcuts
Navigate to the next XML node.
Navigate to the previous XML node.
Navigate one word forward.
Navigate one word backward.
Position the cursor at the beginning of the document.
Position the cursor at the end of the document.
Navigating with the Outline View
Oxygen XML includes an Outline view that displays a hierarchical tag overview of
the currently edited XML Document.
You can use this view to quickly navigate through the current document by selecting nodes
in the outline tree. It is synchronized with the editor area, so when you make a selection
in the Outline view, the corresponding nodes are highlighted in the
editor area.
Figure 1. Outline View Navigation in Text Mode
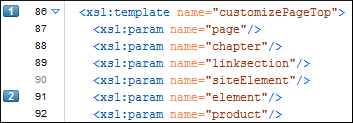
Using the Breadcrumb to Navigate
A breadcrumb on the top stripe indicates the path from the document root element to
the current element. It can also be used as a helpful tool to navigate to specific elements
throughout the structure of the document.
Figure 2. Breadcrumb in Text Mode
The last element listed in the breadcrumb is the element at the current cursor
position. The current element is also highlighted by a
thin light blue bar for easy identification. Clicking an element from the
breadcrumb selects the entire element and navigates to it in the editor area.
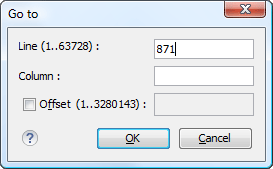
Navigating with the Go To Dialog Box
In Text mode, you can navigate precisely to a location in the
document you are editing by using the Go
to dialog boxpressing (Ctrl+L (Command+L on macOS)) or
selecting Go To Line from the Navigation
menu. To open this dialog box, press
(Ctrl+L (Command+L on macOS)) or select Find > Go to .
Figure 3. Go to Dialog Box
The dialog box includes the following fields for
specifying a specific navigation location:
Line - Destination line in the current document.
Column - Destination column in the current document.
Offset - Destination offset relative to the beginning of
document.
Navigating with Bookmarks
By using bookmarks, you can mark positions in an edited document so that you
can return to it later. This is especially helpful for navigating through large documents or
while editing multiple documents. You can place up to nine distinct bookmarks
in any document. Shortcut keys are available to navigate to any of the marked positions
(Ctrl+1 through
Ctrl+9). There are also shortcuts for
creating bookmarks (Ctrl+Shift+1 through
Ctrl+Shift+9). You can also configure these
shortcut keys in the Options > Menu Shortcut Keys menu.
Figure 4. Editor Bookmarks
To insert a bookmark in Text mode, do any of the
following:
Click in the vertical stripe on the left side of the editor (to the left of the line
number).
Press F9 on your keyboard or use any of
the specific bookmark creation shortcuts
(Ctrl+Shift+1 through
Ctrl+Shift+9).
Select the Create Bookmark action from the Edit > Bookmarks menu.
To remove bookmark in Text mode, do either of the following:
Left-click its icon in the vertical stripe.
Right-click its icon on the vertical stripe and select Remove
or Remove all (Ctrl+F7 (Command+F7
on macOS)).
To navigate to a specific bookmark, do either of the following:
Use any of the specific bookmark navigation shortcuts
(Ctrl+1 through
Ctrl+9).
Use one of the actions available on the Edit > Bookmarks > Go to menu.
Note:
Navigating with Bookmarks
By using bookmarks, you can mark positions in an edited document so that you
can return to it later. This is especially helpful for navigating through large documents or
while editing multiple documents.
To insert a bookmark in Text mode, right-click the
desired location in the vertical stripe on the left side of the editor and select
Add Bookmark (you can remove it by selecting Remove
Bookmark from the same contextual menu).
To navigate to any of the bookmarks, click their corresponding markers in the
vertical stripe on the right side of the editor.
Tip:
You can configure the color and how the bookmarks are shown from
the Eclipse Annotations preferences page (Window ('Eclipse' on macOSX) > Preferences > General > Editors > Text Editors > Annotations).


 Create Bookmark action from the menu.