DITA Map Validation and Completeness Check
You should validate your DITA maps regularly to make sure that your maps and topics are valid, and all of the relationships between them are working. Changing one topic, image, or piece of metadata may create errors in references that rely on them. You may not discover these problems all at once. Validate your map to catch all of these kinds of problems. The longer you wait between validating your maps, the more difficult it may be to detect and correct any errors you find.
Validating a DITA Map
- In the DITA
Maps Manager view, make sure that the tab that holds your root map is selected and that the
Context selection is set either to the name of your root
map or to
<current map>. - It is a good practice to refresh your DITA map before running the
validation process. To do so, select the DITA map in the DITA
Maps Manager view and click
 Reload
(F5).
Reload
(F5). - Click the
 Validate and Check for Completeness button from the
  Validation drop-down menu on the
DITA Maps Manager toolbar to open the DITA Map Completeness Check dialog
box.
Validation drop-down menu on the
DITA Maps Manager toolbar to open the DITA Map Completeness Check dialog
box. - If you are using profiling, check the Use DITAVAL filters box and select the appropriate option.
- Select any other options you want to check.
- Click Check to run the validation process.
Result: The progress of the validation is displayed in the status bar and can be stopped from there.
Result: The progress of the operation is shown as a task in the Progress view and the operation can be stopped from there.
Validation Process
- Verifies that the file paths of the topic references are valid. For example, if an
@hrefattribute points to an invalid file path, it is reported as an error in the message panel at the bottom of the editor. - Validates each referenced topic and map. Each topic file is opened and validated against the appropriate DITA DTD. If another DITA map is referenced in the main one, the referenced DITA map is verified recursively, applying the same algorithm as for the main map.
- If errors or warnings are found, they are displayed in a separate message pane at the bottom of the editor and clicking them takes you to the location of the error or warning in the file where it was found.
DITA Map Completeness Check Dialog Box
The DITA Map Completeness Check dialog box allows you to configure the DITA map validation.
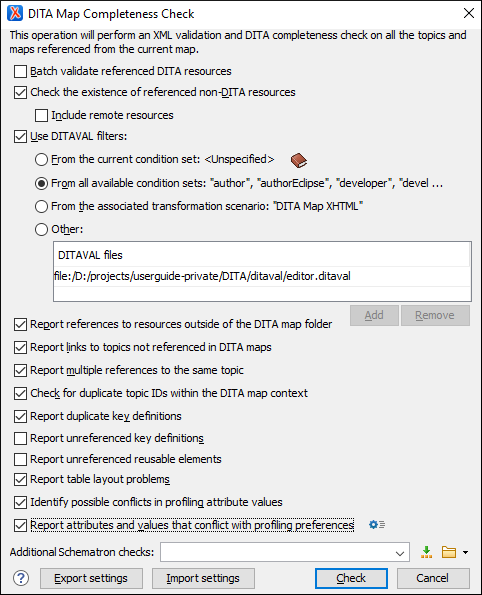
- Use DITAVAL filters
-
The content of the map is filtered by applying a profiling condition set before validation.Note:The validation process also takes branch filtering
<ditavalref>elements into account as long as they appear before the referenced topics.You can choose between the following options:- From the current condition set -
The map is filtered using the condition set currently applied in the DITA Maps
Manager view. Clicking the
 Details icon
opens a topic in the Oxygen XML User Guide that explains how to
create a profiling condition set.
Details icon
opens a topic in the Oxygen XML User Guide that explains how to
create a profiling condition set. - From all available condition sets - For each available condition set, the map content is filtered using that set before validation.
- From the associated transformation scenario - The filtering condition set is specified explicitly as a DITAVAL file in the current transformation scenario associated with the DITA map.
- Other DITAVAL files - For each DITAVAL file from this list, the map content is filtered using the DITAVAL file before validation. Use the Add or Remove buttons to configure the list. The Add button opens a dialog box that allows you to select a local or remote path to a DITAVAL file.
- From the current condition set -
The map is filtered using the condition set currently applied in the DITA Maps
Manager view. Clicking the
- Export settings
- Allows you to export the settings assigned in this dialog box to an XML file that you can share with other users or use on other systems.
- Import settings
- Allows you to import settings for this dialog box from an XML file that was created by the Export settings action.
- Check
- Use the Check button to begin the validation process. The options that you choose in this dialog box are preserved between sessions.