Edit Properties Dialog Box
 Edit properties action is
available on both the DITA Maps Manager toolbar and in the contextual
menu. This action is also available in the contextual menu when you edit a DITA map document in
Author mode. The action opens the Edit
Properties dialog box and it includes several tabs with various functions and
fields that are initialized with values based upon the node where the action was
invoked.Edit properties action, only
the Profiling tab will be available and your modifications in that
tab will be applied to all the selected nodes. If you select multiple nodes that are not on
the same hierarchical level, the other tabs will also be available and your modifications
will be applied to the parent node (the child nodes will inherit the attributes of the
parent node).
Edit properties action is
available on both the DITA Maps Manager toolbar and in the contextual
menu. This action is also available in the contextual menu when you edit a DITA map document in
Author mode. The action opens the Edit
Properties dialog box and it includes several tabs with various functions and
fields that are initialized with values based upon the node where the action was
invoked.Edit properties action, only
the Profiling tab will be available and your modifications in that
tab will be applied to all the selected nodes. If you select multiple nodes that are not on
the same hierarchical level, the other tabs will also be available and your modifications
will be applied to the parent node (the child nodes will inherit the attributes of the
parent node).You can use the Edit Properties dialog box to modify or define attributes, metadata, profiling, or keys in DITA maps or topics. You can also use it to modify the title of root maps.
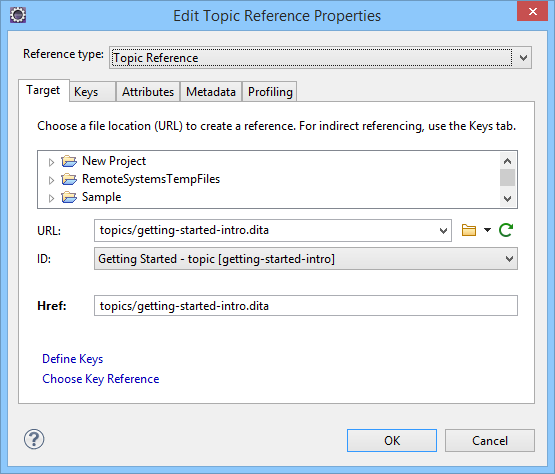
At the top of the Edit Properties dialog box, the Reference type drop-down list displays the type of the selected node and it depends on the node where the action was invoked.
The main section of the dialog box includes the following tabs: Target, Keys, Attributes, Metadata, and Profiling. The availability of the tabs and their functions depend on the selected node. For example, if you invoke the action on a root map, only the Attributes, Metadata, and Profiling tabs are accessible and the Title property can be configured. Also, if you select multiple nodes, only the Profiling tab is available.
Target Tab

Keys Tab
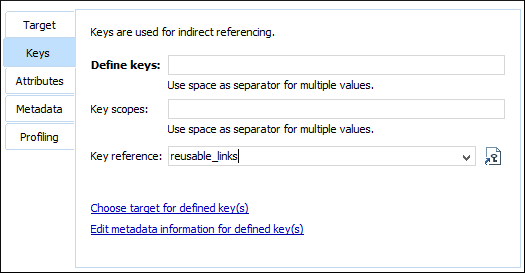
- Key reference
- Use this combo box (or the
 Choose
key reference button) to select a key that is already defined in the
root map.
Choose
key reference button) to select a key that is already defined in the
root map.
Attributes Tab
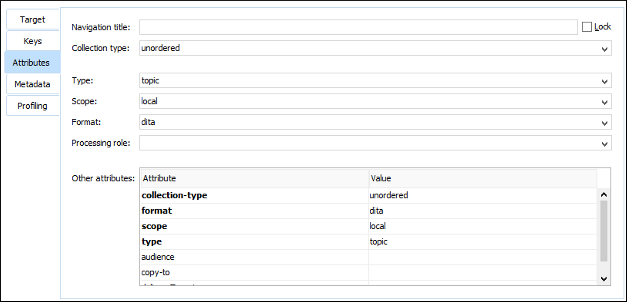
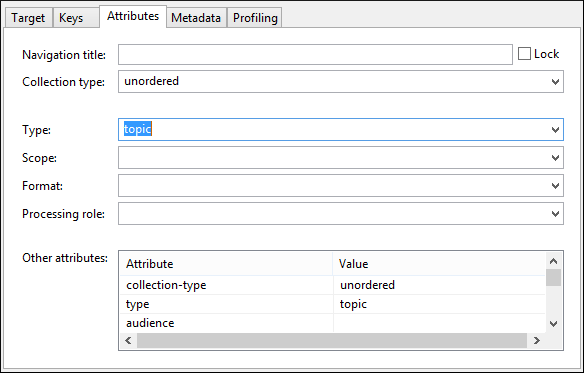
The Attributes tab of the Edit Properties dialog box allows you to insert and edit attribute values for the target node where the action was invoked.
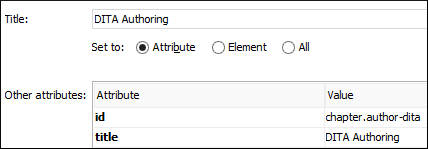
If the target is a root map, the tab displays the title of the map. You can change it in the Title text field and assign it to an Attribute, Element, or All. However, if the title of the map contains elements other than plain text, the title is not editable and cannot be changed using this dialog box (you would need to open the DITA map in the main editor to edit the title).
For other types of targets, the tab includes the following sections and fields that can be used to edit the attributes of the target:
Metadata Tab
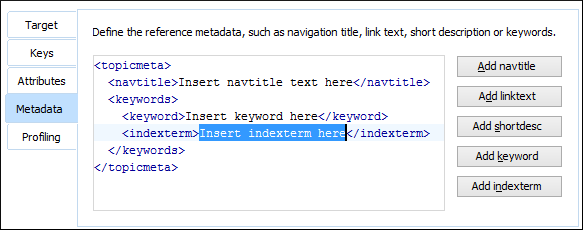
The Metadata tab allows you to add metadata elements to the target node.
Profiling Tab
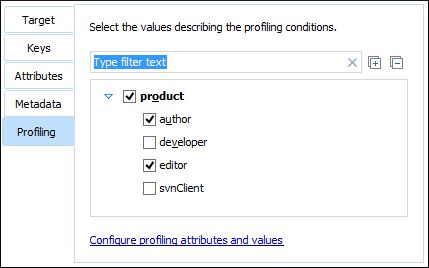

If you have a large list of profiling attributes, you can use the text filter field to
search for attributes or values, and you can expand or collapse attributes by using the
 Expand All/
 Collapse All buttons to the right of the
text filter or the arrow button to the left of the profiling attribute name.
Collapse All buttons to the right of the
text filter or the arrow button to the left of the profiling attribute name.
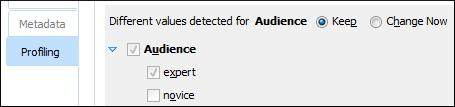
Edit
properties action on a selection of multiple nodes that have different values
for the same profiling attribute, a conflict panel will be displayed in the
Profiling tab and you can choose between the following actions for
resolving it:- Keep - Preserves the current attribute values.
- Change Now - Allows you to edit the selection of values in this Profiling tab and the changes will be applied to all the selected nodes.

Finalizing Your Modifications
Once you click OK, all your changes are applied to the target node.